Pothos Propagation Guide — Water, Soil, and Division Methods
Free plants. That's the promise. Here's how to actually do it without killing everything.
Why Propagate Pothos?
Here's the thing about pothos: they're basically designed to propagate. Those long trailing vines? They're evolution's way of making sure you can clone your plant infinitely.
What you get:
- Free plants (hard to argue with that)
- Fuller mother plants (cut back leggy vines to encourage bushier growth)
- Gifts for friends who kill everything but somehow still want plants
- Insurance against killing the original (propagation is also a backup plan)
Pothos are nearly impossible to fail at once you understand one thing: the node.
Understanding Nodes
This is the make-or-break concept. Skip this and you'll wonder why your cuttings never root.
What is a node? It's that small brown bump on the stem where leaves and aerial roots emerge. It's the joint where your stem connects to the vine.
Why it matters: Roots grow from nodes. Not from stems, not from leaves — nodes. Every cutting needs at least one node. Two is better. Three is luxurious.
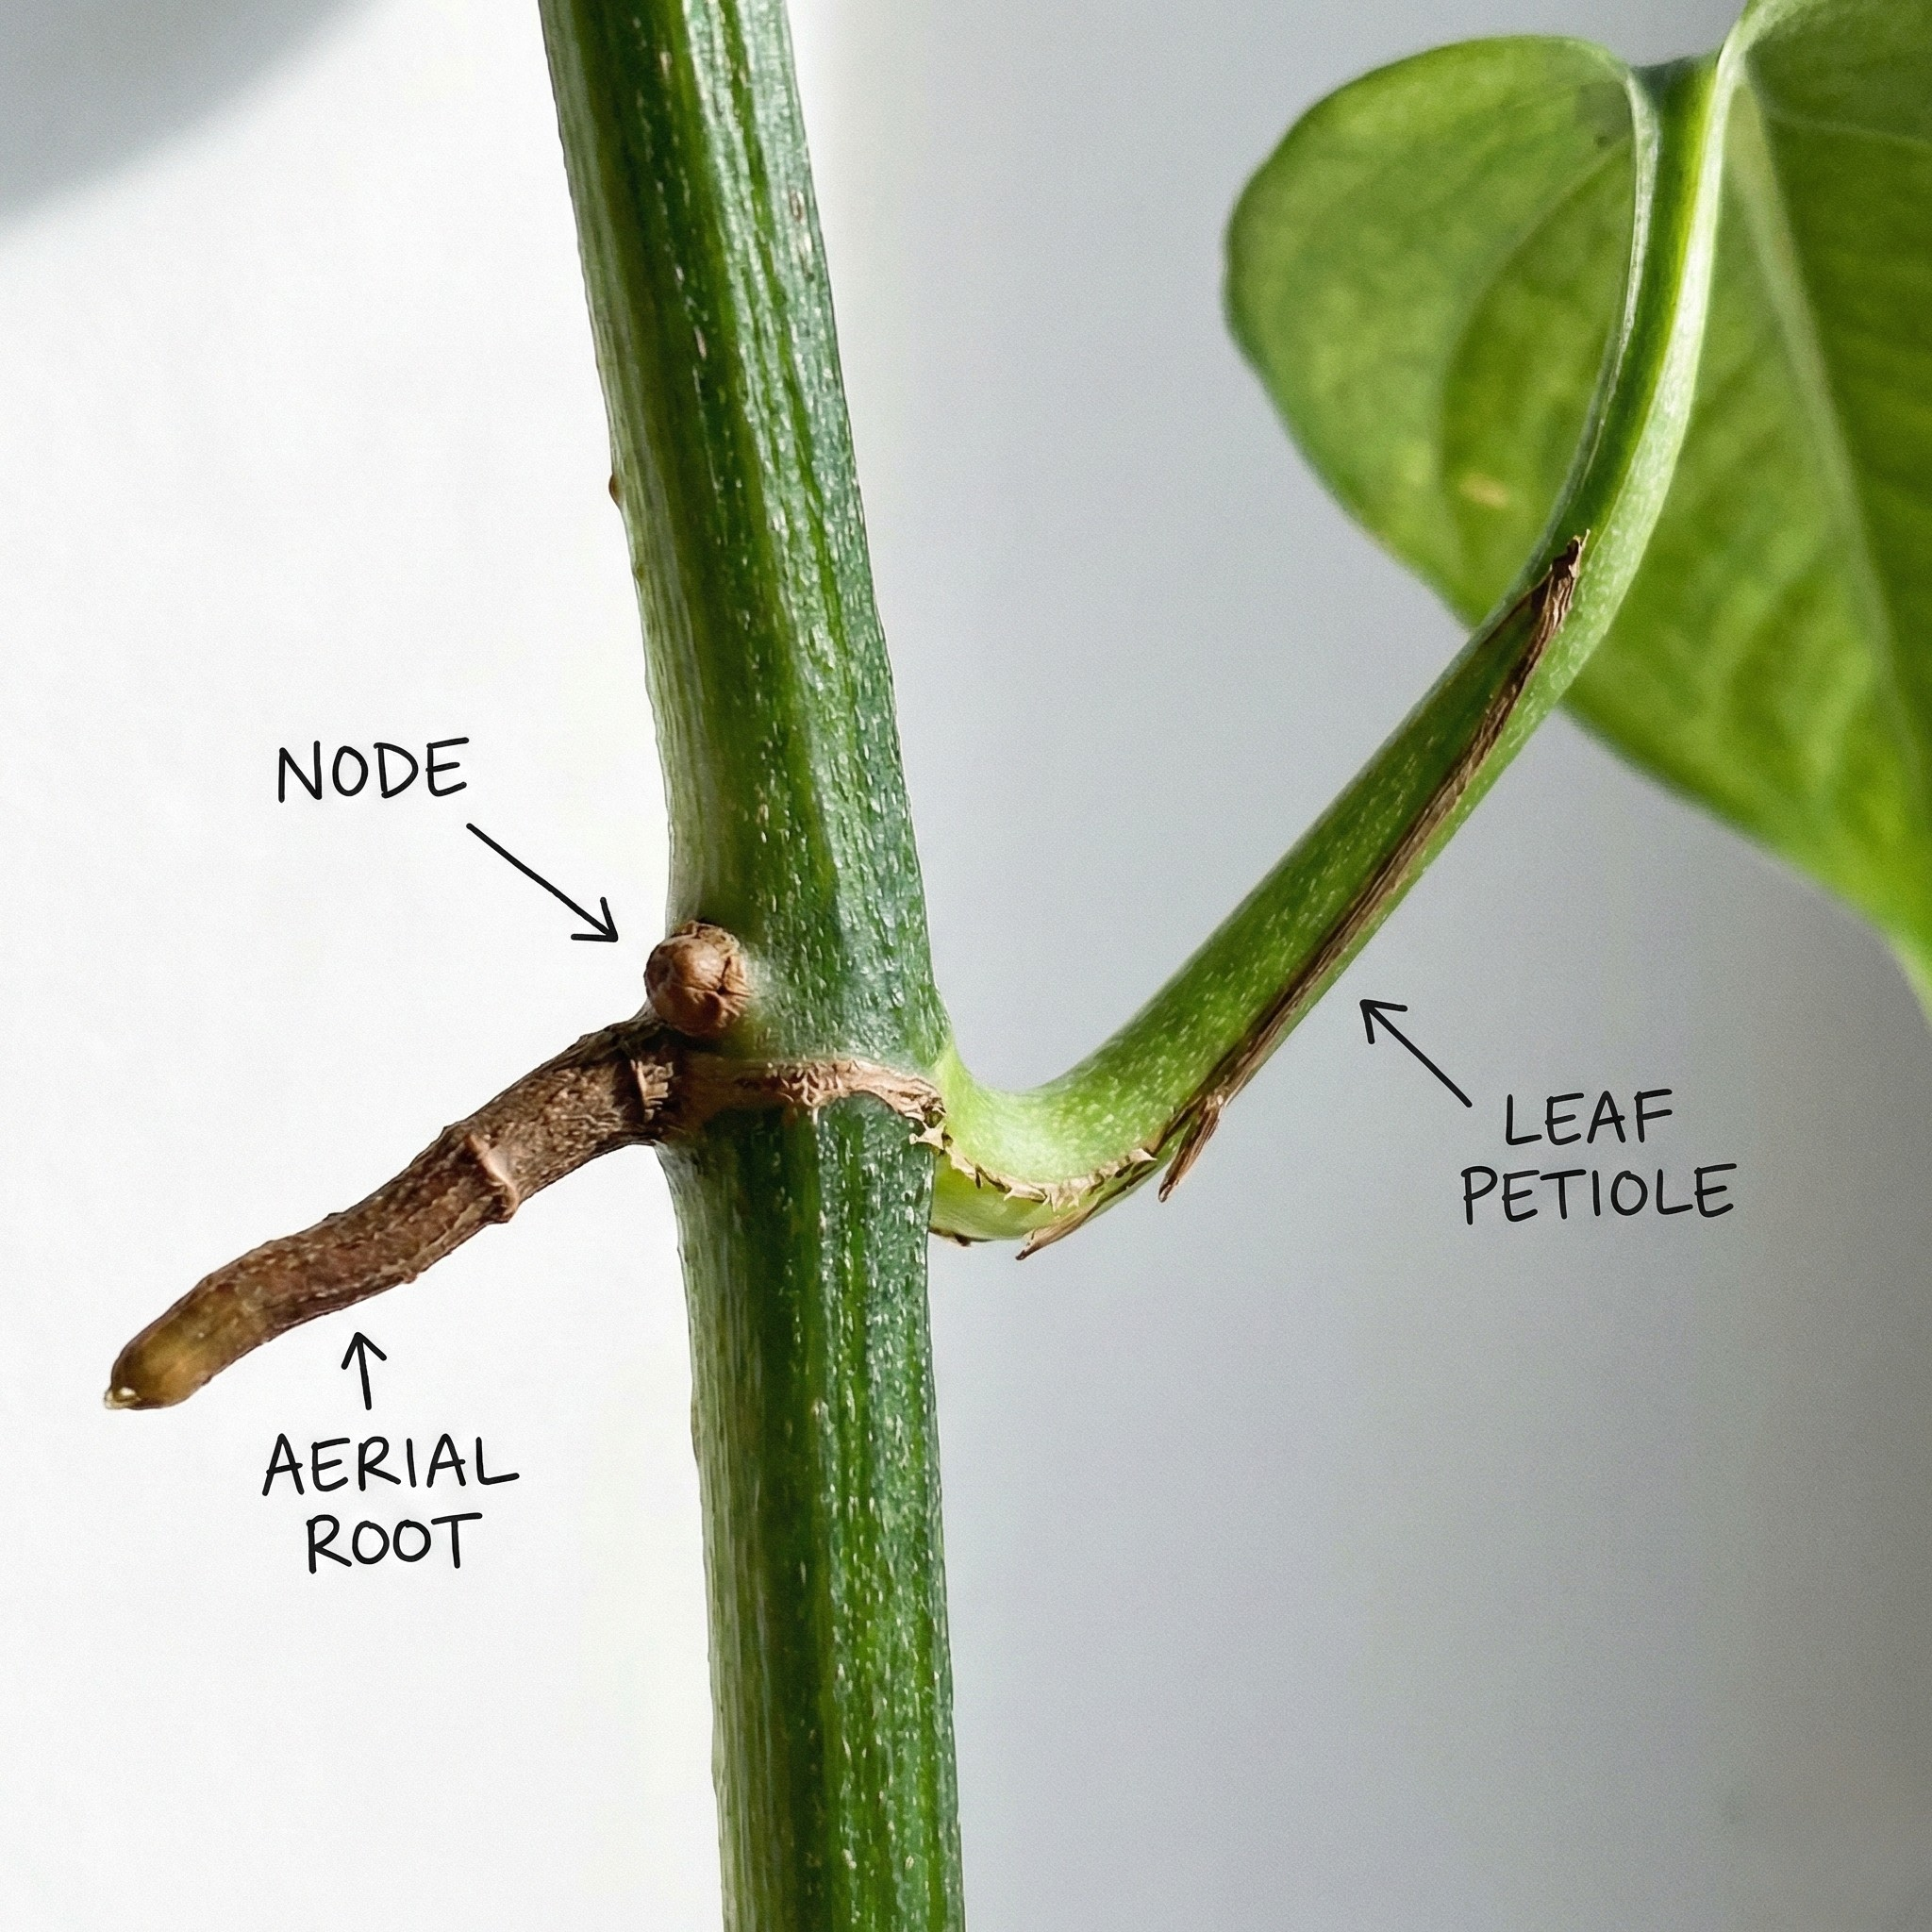
A leaf without a node? That's a leaf. It'll look nice for a few weeks, maybe even root a tiny bit, but it'll never become a plant. It will eventually rot and break your heart.
What You'll Need
Gather your supplies before you start:
- Sharp scissors or pruning shears — dull tools crush stems and invite rot
- Clean glass jar or propagation vase — anything that holds water
- Well-draining potting mix — if going the soil route
- Optional but helpful: rooting hormone, perlite, moisture meter
Pro tip: clean your scissors between plants if you're propagating multiple varieties. Bacteria and viruses spread, and nobody wants to introduce pests to their propagation station.
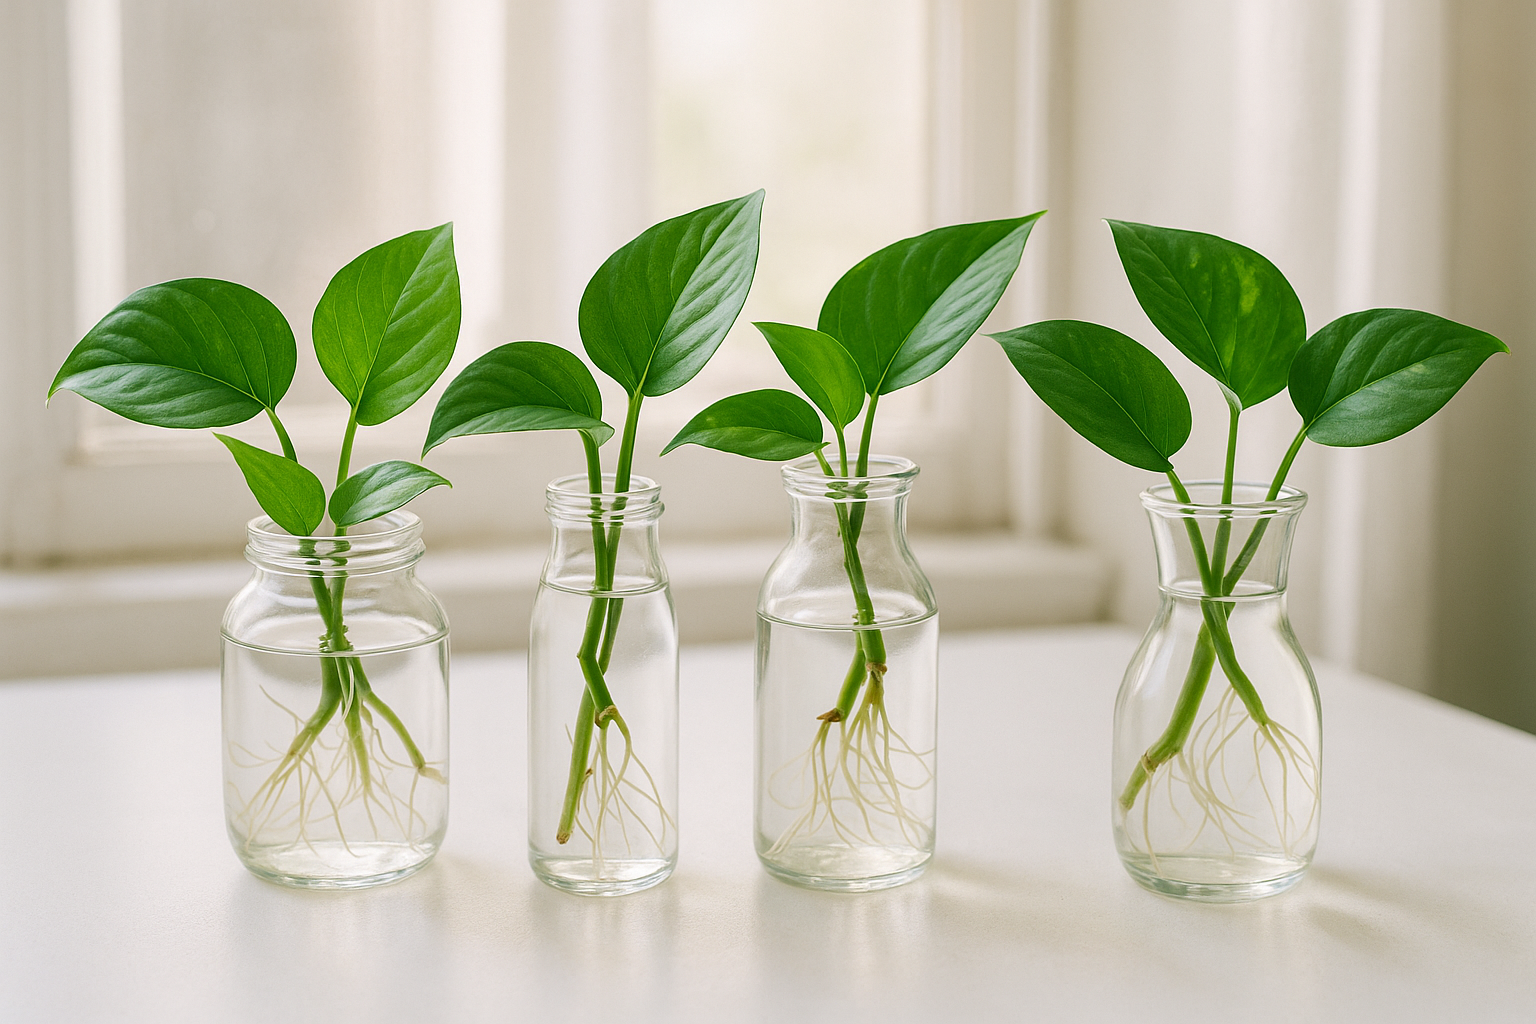
Method 1: Water Propagation
This is the most popular method and honestly the most satisfying. You get to watch roots grow in real-time.
Step 1: Take Your Cutting
Find a healthy vine with multiple leaves. Look for visible nodes (those brown bumps we talked about).
Cut below a node — aim for 4-6 inches of stem below the node. Make cut clean your (don't crush the stem).
How many leaves? Leave 2-3 leaves on the cutting. More than that and the cutting struggles to support itself while rooting. Fewer and you don't have enough photosynthesis happening.
Step 2: Prepare the Cutting
Remove the leaf closest to the cut end. That node needs to be exposed and ready to root. Leave the other leaves intact — they're doing photosynthesis and feeding the cutting.
If you're using rooting hormone, dip the cut end in powder before placing in water. This isn't strictly necessary for pothos (they root easily), but it speeds things up and reduces rot risk.
Step 3: Place in Water
Fill your jar with room-temperature water. Room temperature. Not cold, not hot.
Critical: The node goes underwater. The leaves stay above water. If leaves sit in water, they'll rot and take the whole cutting with them.

Set it somewhere with bright indirect light. Direct sun cooks the water and the roots. A north-facing window or a few feet back from an east/west window is perfect.
Step 4: Wait (The Hard Part)
Change the water every 1-2 weeks. Fresh water = oxygen = healthier roots. If the water gets cloudy or smelly, change it immediately.
Timeline:
- Week 1-2: Tiny white nubs appear (root initials)
- Week 2-3: Roots grow to 1-2 inches
- Week 3-4: Roots are established and ready to pot
Some varieties root faster than others. Golden pothos is a speed demon. Marble queen can take longer. variegated varieties are generally slower because they have less chlorophyll working for them.
Step 5: Pot It Up
When roots are 2-3 inches long, it's time to pot. Don't wait longer than this — long water roots need to transition to soil eventually, and the longer you wait, the harder the transition becomes.
Pot in well-draining soil in a container only slightly larger than the root ball. Water thoroughly, then let it dry out according to normal pothos care.
Transition tip: For the first week after potting, keep the soil consistently moist (not soggy). This helps the water roots adjust to soil life.
These pretty glass vases keep leaves above water and let you watch roots grow. Check current prices on Amazon →
Method 2: Soil Propagation
Water propagation is fun, but soil propagation has advantages: you skip the transition period, and the plant is already in its final medium.
Step 1: Take Your Cutting
Same as water method — cut below a node, leave 2-3 leaves, remove the bottom leaf to expose the node.
Step 2: Prepare Your Medium
Use a well-draining mix. Pure potting soil stays too wet and invites rot. Mix in perlite (50/50 is a good starting point) or use a succulent/cactus mix.
Moisten the soil before you pot. It should be damp, not soaking. Think wrung-out sponge consistency.
Step 3: Pot the Cutting
Make a small hole in the soil with your finger or a pencil. Insert the cutting so the node is buried about an inch deep. Gently pack soil around the stem to hold it upright.
Step 4: Care and Waiting
Place in bright indirect light. Keep the soil consistently moist (again, damp, not soggy) for the first 2 weeks.
After 2 weeks, gently tug on the cutting. If there's resistance, roots have formed. If it pulls out easily, give it more time.
The main challenge with soil propagation is moisture management. Too wet = rot. Too dry = the cutting shrivels. Use a moisture meter if you want to take the guesswork out of it.
A little dip of rooting hormone speeds things up and reduces rot risk. See on Amazon →
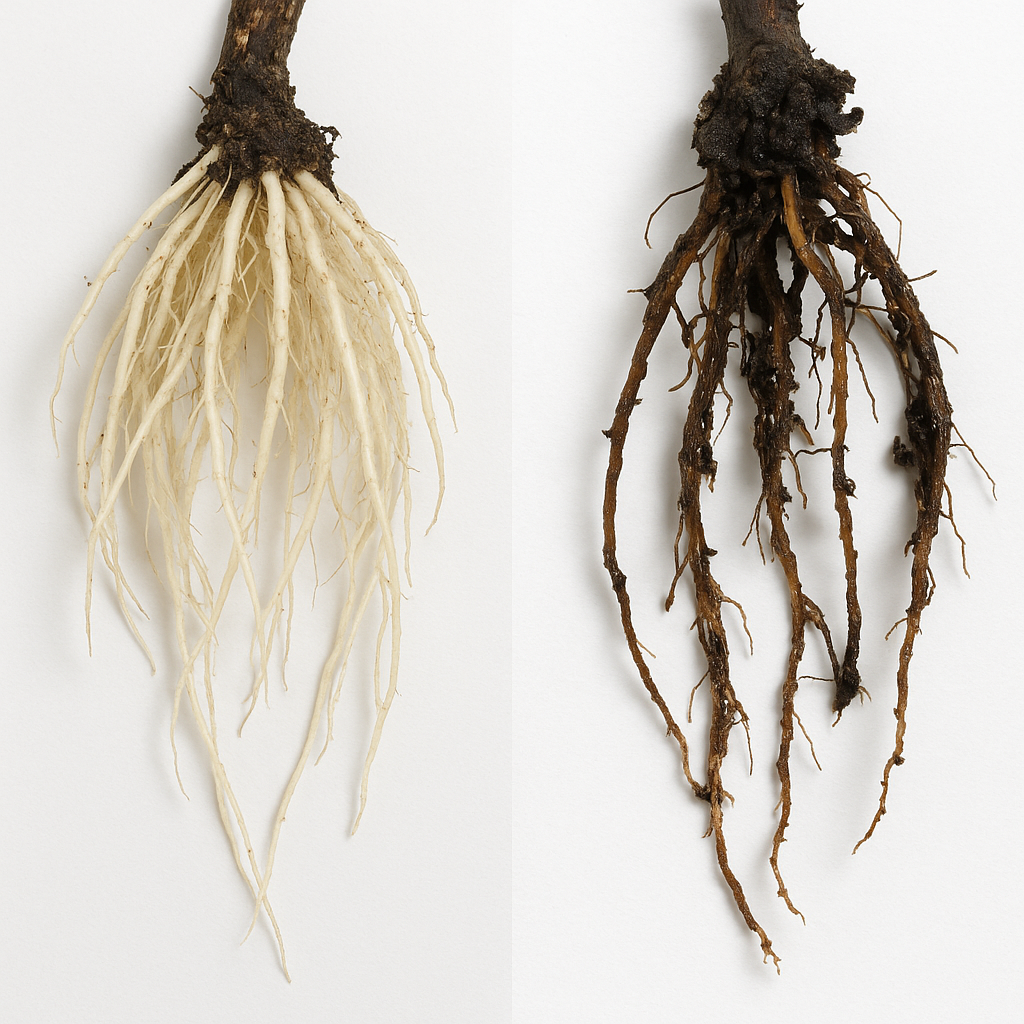
Why Your Pothos Cuttings Are Rotting
Rot is the #1 propagation killer. Here's how to spot it and prevent it.
Signs of Rot
- Stem turns brown or black
- Stem feels mushy or slimy
- Stem separates easily from the plant
- Foul smell from the water or soil
Causes and Fixes
Too much water: The node is submerged, leaves are submerged, or soil never dries out. For water, make sure only the node is underwater. For soil, let the top inch dry between waterings.
No air circulation: Stagnant water breeds bacteria. Change water weekly. Use fresh, well-draining soil.
Cold temperatures: Pothos hate cold. If your propagation station is near a drafty window or in a cold room, root development slows and rot accelerates. Room temperature is ideal.
Dirty tools: Always use clean scissors. Dirty blades introduce bacteria.
Cutting too close to the node: If you cut right at the node without any stem below it, you've got no buffer. The node itself can rot. Always leave 1-2 inches of stem below the node.
Method 3: Division
Division is the underrated propagation method. It's faster than stem cuttings and you get an instant mature plant.
When to Divide
Division works best when:
- Your pothos has outgrown its pot
- The plant has multiple crowns (bunches of vines coming from the soil)
- You want to reduce the size of a massive plant
- You're repotting anyway
How to Divide
- Remove the plant from its pot — gently ease the root ball out
- Inspect the root ball — look for natural separations where stems have their own root clusters
- Separate — pull apart the root ball into sections. You can often do this by hand, but a clean knife helps for tough tangles
- Pot each division — plant in appropriately sized containers with fresh soil
- Water thoroughly — settle the soil and eliminate air pockets
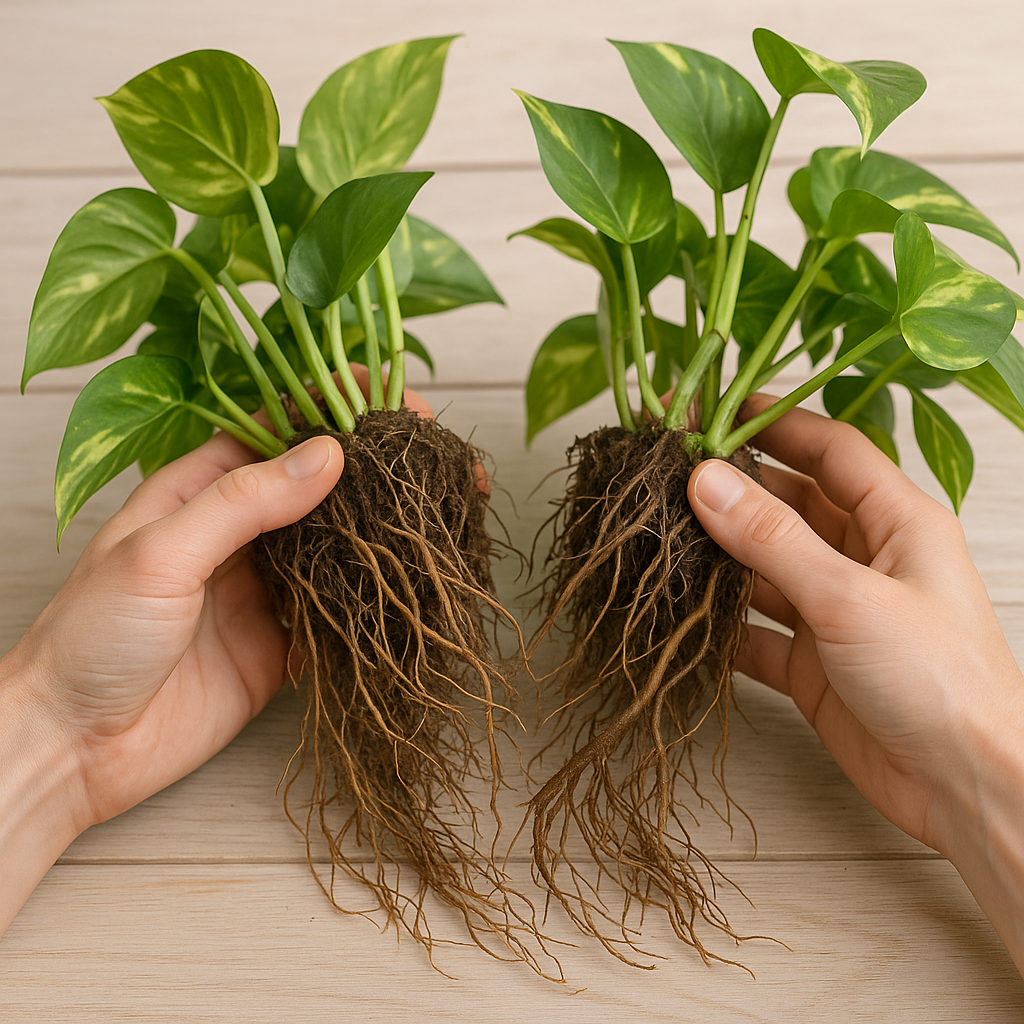
The advantage of division is obvious: you skip the whole "wait for roots" thing. The plant is already rooted. It just needs to recover from the stress of division, which takes 1-2 weeks.
Timeline Summary
Here's what to expect at each stage:
| Week | Water Method | Soil Method | Division |
|---|---|---|---|
| 1 | Roots begin | Settling in | Recovery |
| 2-3 | Roots 1-2" | Roots forming | New growth |
| 3-4 | Ready to pot | Ready to pot | Established |
Troubleshooting Common Problems
Cuttings Won't Root
- No node included? This is almost always the reason. Every cutting needs a node.
- Not enough light? Move to brighter indirect light.
- Too cold? Find a warmer spot.
- Water needs changing? Fresh water = happy roots.
Leaves Yellowing
- Overwatering — if soil is soggy, let it dry out
- Underwatering — if soil is bone dry, water more frequently
- Natural older leaves — the lowest leaf on a cutting will eventually yellow and die. It's fine. If multiple leaves yellow, investigate.
Cutting Looks Wrinkly
- Too dry — increase watering or humidity
- Rooted in water, transitioning to soil — normal during the transition, should firm up once established
Plant Dies After Potting
- Root shock — water roots need time to adapt. Keep soil moist for the first week
- Root rot — if roots were too long when you potted, they may have rotted. Next time, pot when roots are 2" not 4"
Wrapping Up
Pothos propagation is not complicated. The learning curve is shallow and the success rate is high. The key points:
- Always include a node
- Keep leaves out of water
- Change water regularly (water method)
- Don't pot up too early
- Be patient
Once you propagate your first pothos, you'll be hooked. It's addictive. You'll find yourself taking cuttings from every plant you own, looking for new friends to inflict free plants on.
Need help with pothos care after propagation? Check out our Pothos Complete Care Guide for watering, light, and troubleshooting. Or learn why your pothos isn't trailing if you're dealing with a reluctant vine.
Products We Love
These are the tools we use ourselves for propagation:
- Moisture Meter — Takes the guesswork out of watering soil-propagated cuttings.
- Perlite — Mix into your soil propagation mix for better drainage.
- Pruning Shears — Clean cuts = healthier cuttings. Worth the small investment.