Plant Emergency First Aid: Save a Dying Plant in 48 Hours
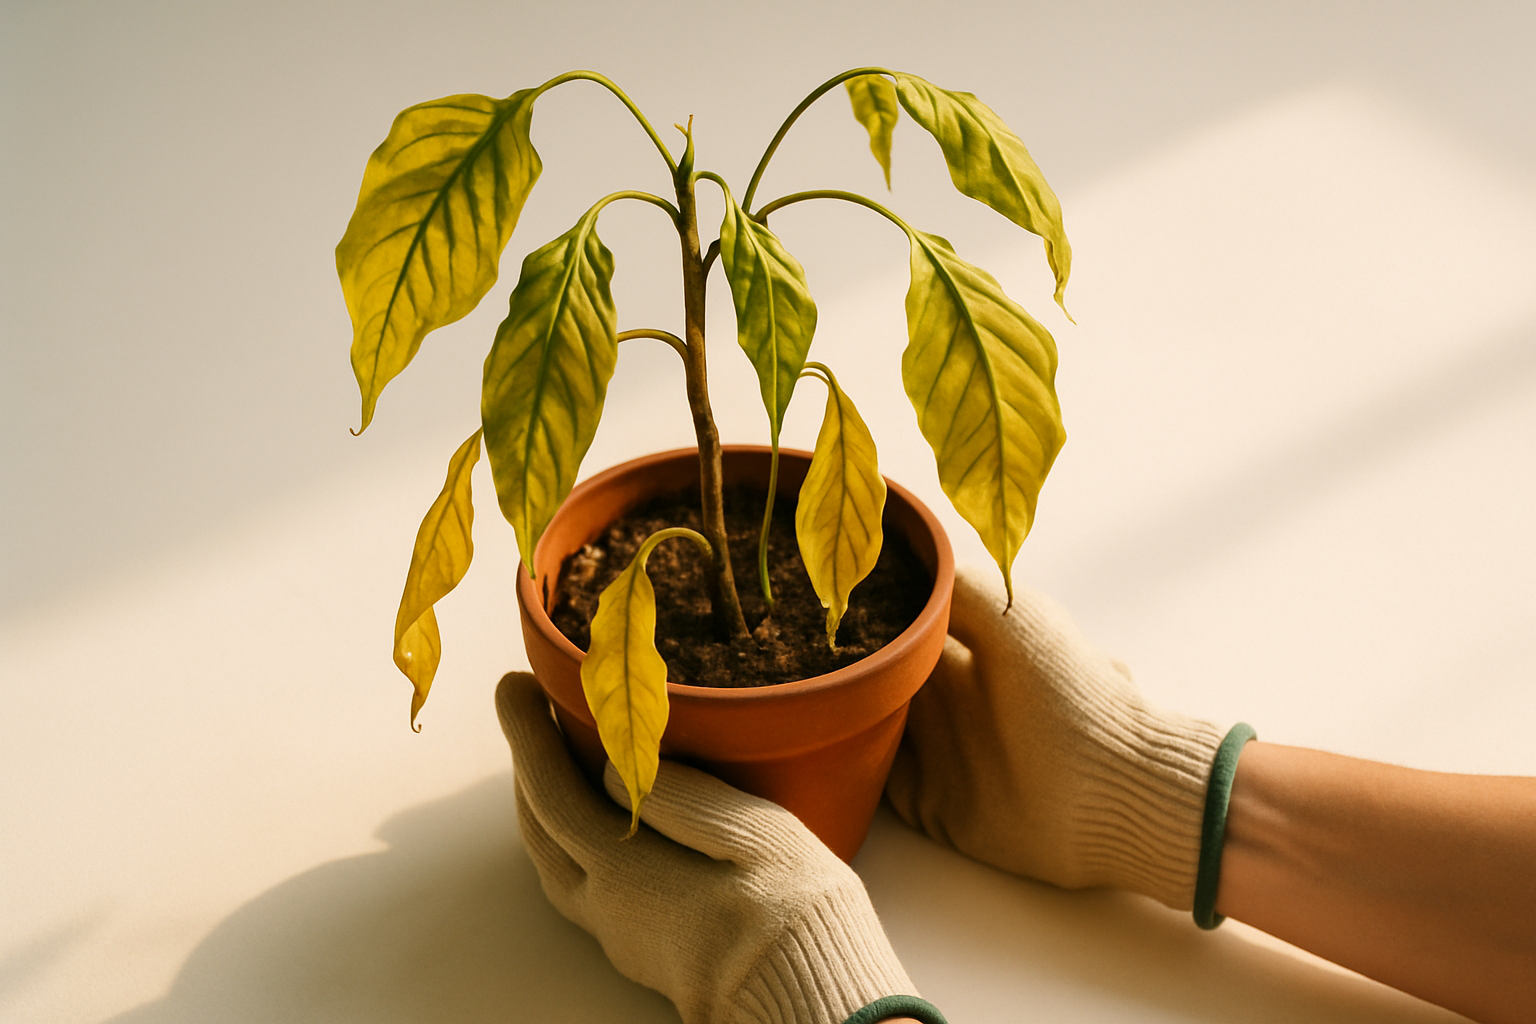
Your plant is crying for help right now. This is the 48-hour protocol that tells you exactly what to check first, what to do next, and when to give up.
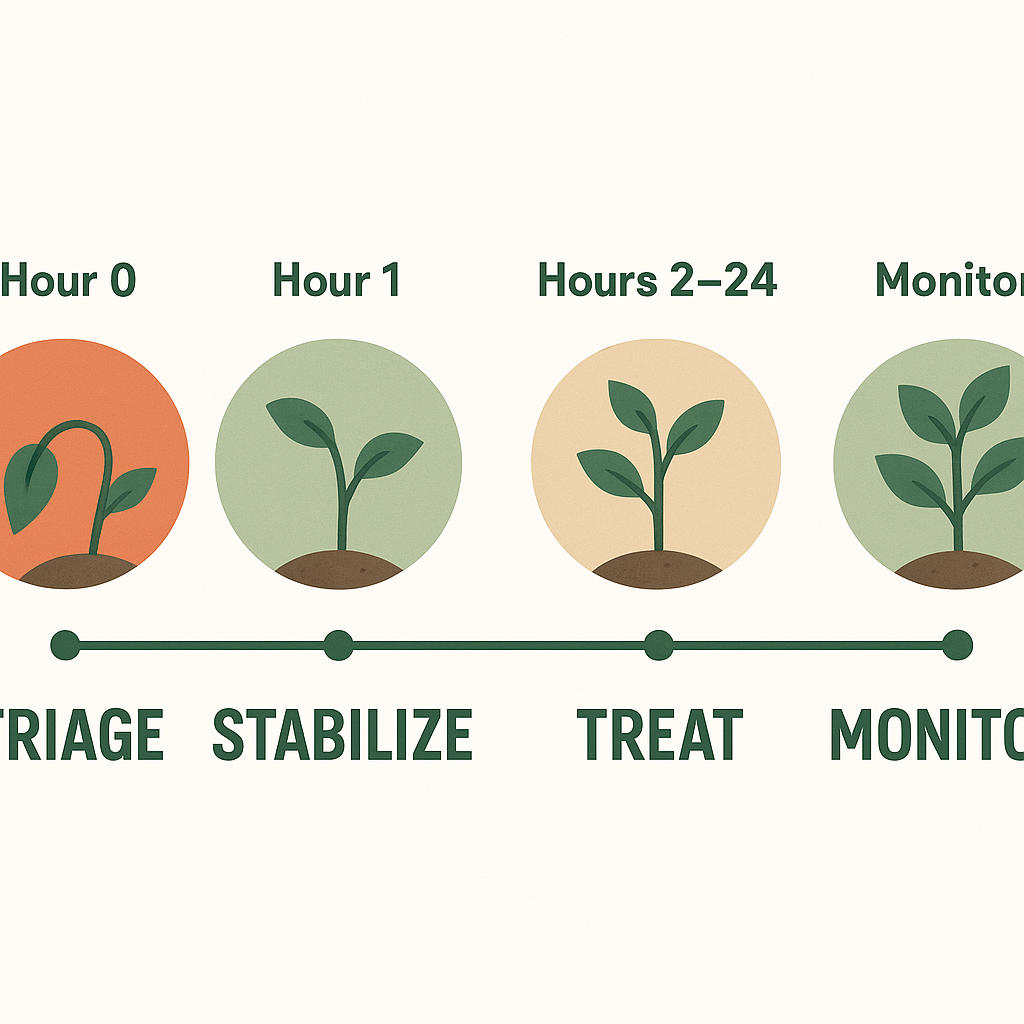
The 48-Hour Triage Checklist (Can You Save It?)
Before you touch anything — before you grab the watering can, before you Google frantically — run this 30-second check. It tells you whether you're in save territory, propagate territory, or accept-loss territory.
The emergency triage:
- Squeeze the stem — firm = alive-ish. Mushy or hollow = move to the trash decision now.
- Check the roots — white and firm = healthy. Brown, mushy, or smelly = root rot (salvageable if caught early).
- Look at the leaves — any green left, even if wilted? That's a fighting plant. Fully brown and crispy? That section is gone, but the plant might still have fight in the crown.
- Smell the soil — rotty, sour, or musty smell means anaerobic conditions (root rot or overwatering).
If the stem is firm and at least some roots are white and firm: you can save this. Keep reading. If the stem is mushy: skip to the decision tree — it's propagation or trash time.
What Killing Your Plant (And How to Tell Fast)
The good news: most plant deaths are caused by five things, and you can identify all of them in under five minutes.
Overwatering
Soil stays wet for days. Leaves look droopy and sad — but the soil is wet. Classic mix-up: people see drooping and think "needs water" when actually the roots are drowning. The fix is drying out, not watering more.
Underwatering
Soil is bone dry, cracks at the surface, and pulls away from the pot edges. Leaves are crispy at the tips or edges, and the whole plant looks limp but not rotted. This one is easy to fix — but don't just dump water on it from above (it'll run straight through).
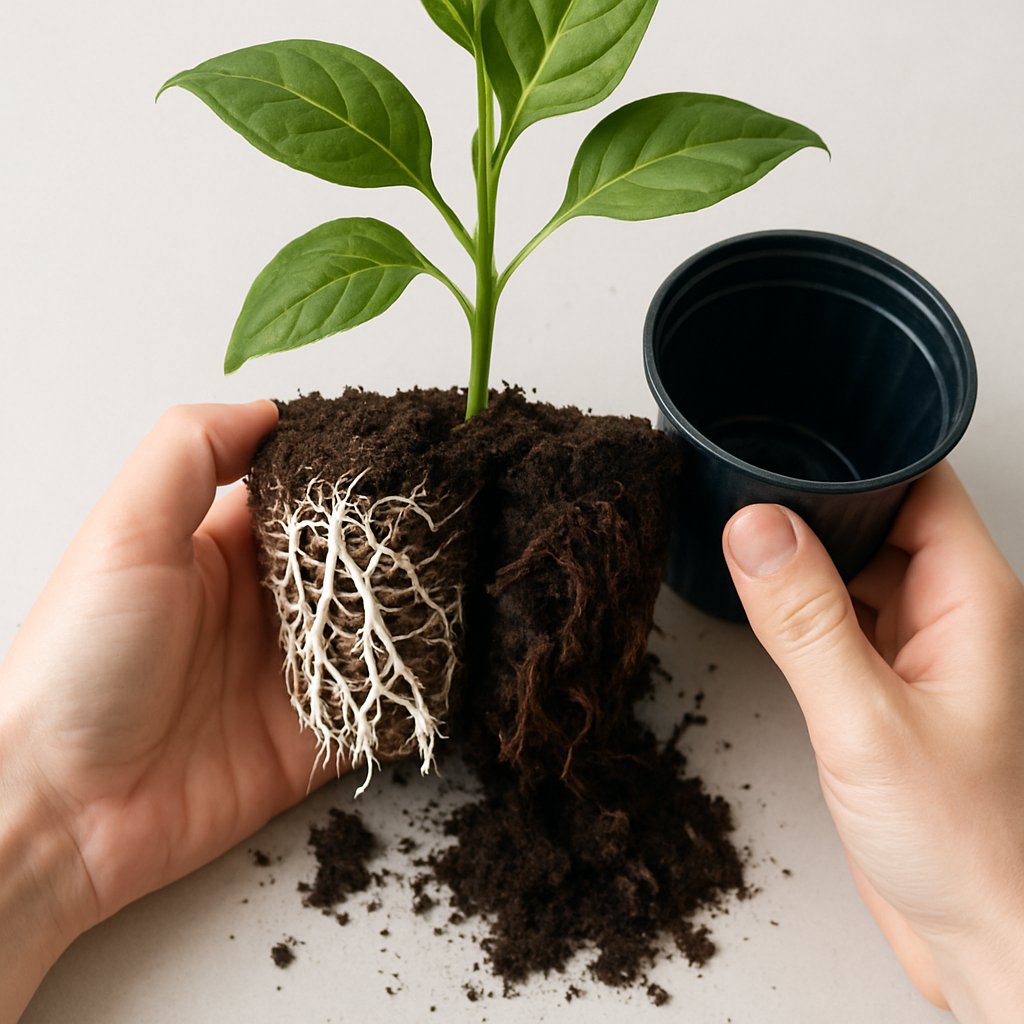
Root Rot
The big one. Happens when soil stays wet too long and roots start decaying. You'll know it when you see it: roots turn brown, mushy, and smell bad. The plant above the soil wilts despite wet soil — because the roots are already dead and can't absorb water anymore. Time matters here. The longer you wait, the less root left to save.
Transplant Shock
Did you repot recently? If your plant looked fine, then declined within a week of repotting, you might be dealing with transplant shock. Wrong soil type, a pot too big (excess moisture holds), or root damage during repotting are the usual suspects.
Pest Infestation
Spider mites, mealybugs, fungus gnats, thrips — all of them can wreck a plant fast. Check the undersides of leaves and the stem joints. Tiny webs, white cottony spots, or crawling insects mean you've got company.
Hour 1: Stabilize Your Plant
Stabilization is the same regardless of what's killing your plant. Do these things in order, right now.
Move to indirect light. Not dark, not direct sun. Stressed roots and cells can't handle bright light — photosynthesis is already compromised. Indirect light (a few feet from a window, no direct rays) is the plant equivalent of bed rest.
Clear dead leaves. Brown, fully crispy, or yellow leaves that fall off with a light touch — remove them. They're not coming back, and they drain the plant's energy trying to keep dead tissue alive.
Check the pot drainage. Does it have holes? If not, your plant is sitting in a puddle. That's a root rot factory. Move the plant to a pot with drainage holes, even if it's ugly. Save the aesthetics for when the plant is recovered.
Quarantine the plant. Move it away from your other plants. If it's pests, you don't want to deal with that on top of whatever else is going wrong.
Do not water yet. I know the plant looks sad. I know you want to help. But watering before you diagnose is like giving someone a bandage before you know if they're bleeding. Check the soil moisture first — not just the surface, stick your finger an inch or two down. If it's wet below the surface, overwatering or root rot is your problem. If it's dry all the way through, underwatering is the culprit.
Get a Moisture Meter Before You Start →
Hour 2–24: Treat the Cause
Stabilization buys you time. Now you fix the actual problem.
How to Dry Out an Overwatered Plant Fast
- Unpot the plant carefully. Lay the root ball on newspaper or a paper bag and let it air-dry for 2–4 hours.
- While it dries, check the roots: white and firm = healthy. Brown, mushy, or smelly = root rot (see below).
- If there's any rot, trim the affected roots with clean, sharp snips. Make the cut clean — no tearing.
- If the soil smells sour or stays wet for days after watering, you need better drainage. Add perlite to your next repotting mix, or switch to a chunky, fast-draining mix.
- Repot in fresh, dry chunky mix. Do not water for 48 hours. Then water sparingly — the root system needs time to recover.
Clean Pruners Are Non-Negotiable for Emergency Plant Care →
How to Bottom-Water an Underwatered Plant
Bottom-watering is how you actually hydrate a severely dry plant. Top-watering just runs straight through bone-dry soil.
- Fill a tray or basin with room-temperature water.
- Set the pot in the tray. Walk away for 20–30 minutes.
- The soil will wick up water from the bottom — this is how roots actually drink, not from above.
- Remove the pot from the tray. Let it drain.
- Move to indirect light. Mist the leaves lightly if they look crispy.
- Do not water again until the soil is dry. Bone-dry to soaking wet is a huge swing — give the roots time to recover.
How to Treat Root Rot with Hydrogen Peroxide
Root rot is the one emergency where every hour counts. The longer the anaerobic conditions persist, the more root you lose.
- Unpot the plant. Rinse the roots under running water to see what you're working with.
- Inspect every root. White, firm, and fleshy = healthy. Brown, mushy, or stringy = dead. If it crumbles between your fingers, it's gone.
- Trim all affected roots back to healthy tissue. Don't be sentimental — brown mushy roots won't recover.
- Dip or rinse the remaining healthy roots in 3% hydrogen peroxide. This kills the anaerobic bacteria causing the rot and oxygenates the root zone.
- Let the roots air-dry for an hour or two.
- Repot in fresh, chunky, fast-draining mix. No returning to the old soil — it's contaminated.
- Do not water for 48 hours. The roots need to heal the cut surfaces before they're exposed to moisture.
Grab 3% Hydrogen Peroxide for Root Rot Treatment →
Hour 24–48: Monitor and Adjust
By now you should be seeing early recovery signals — or you'll know it's time to escalate.
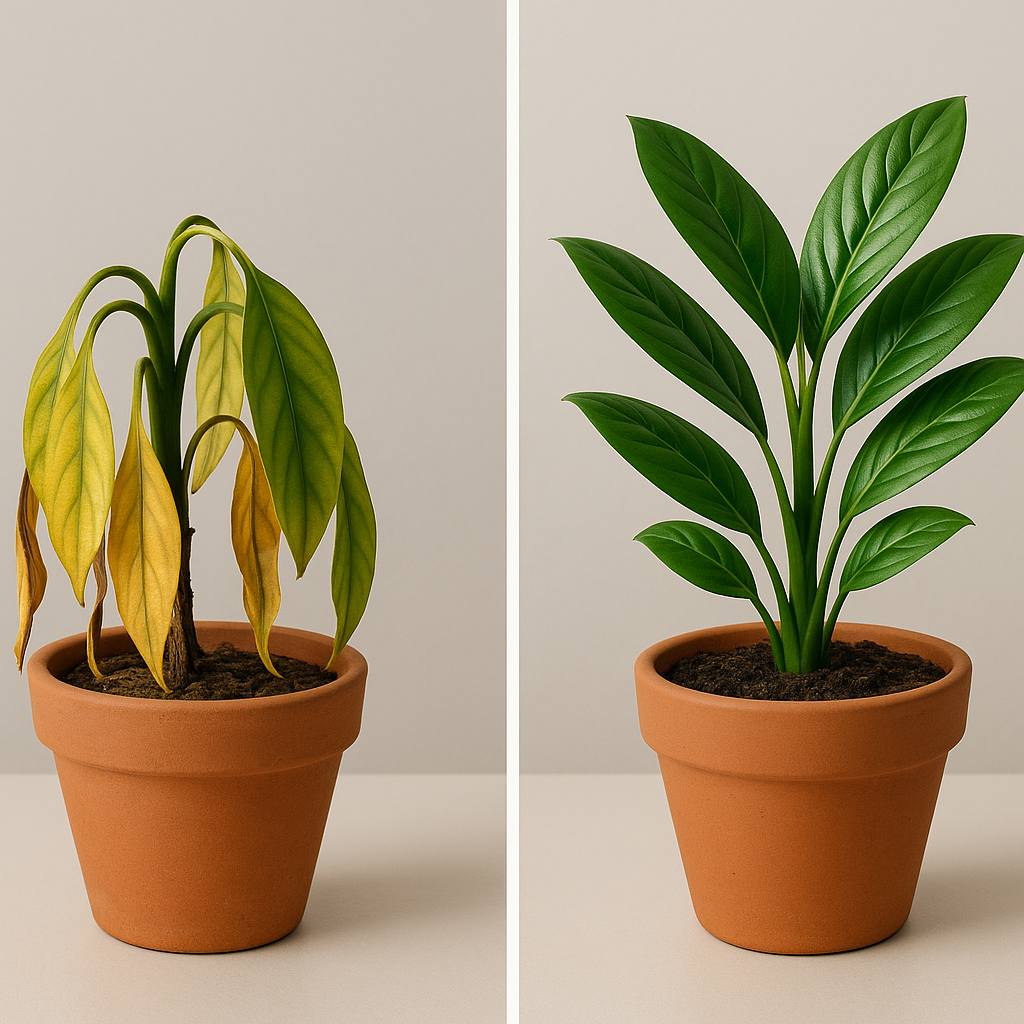
Signs your plant is recovering:
- Leaves start perking up (not fully recovered, but no longer actively drooping)
- Soil moisture stabilizes and stays consistent
- No new yellowing or new leaves falling off
- New growth at the tips (this is the holy grail — new growth means the plant is investing energy again)
If nothing has changed by Hour 48:
- Reassess the roots. Unpot and check again.
- If the root system is too far gone (all brown and mushy), it's time to move to the propagate decision.
- If the stem is firm but roots are gone, you can still propagate — the plant isn't dead yet.
Do not rewater if the soil is still moist. I know it's been 48 hours and you feel like you should do something. Don't. Overwatering is how most people got into this situation in the first place.
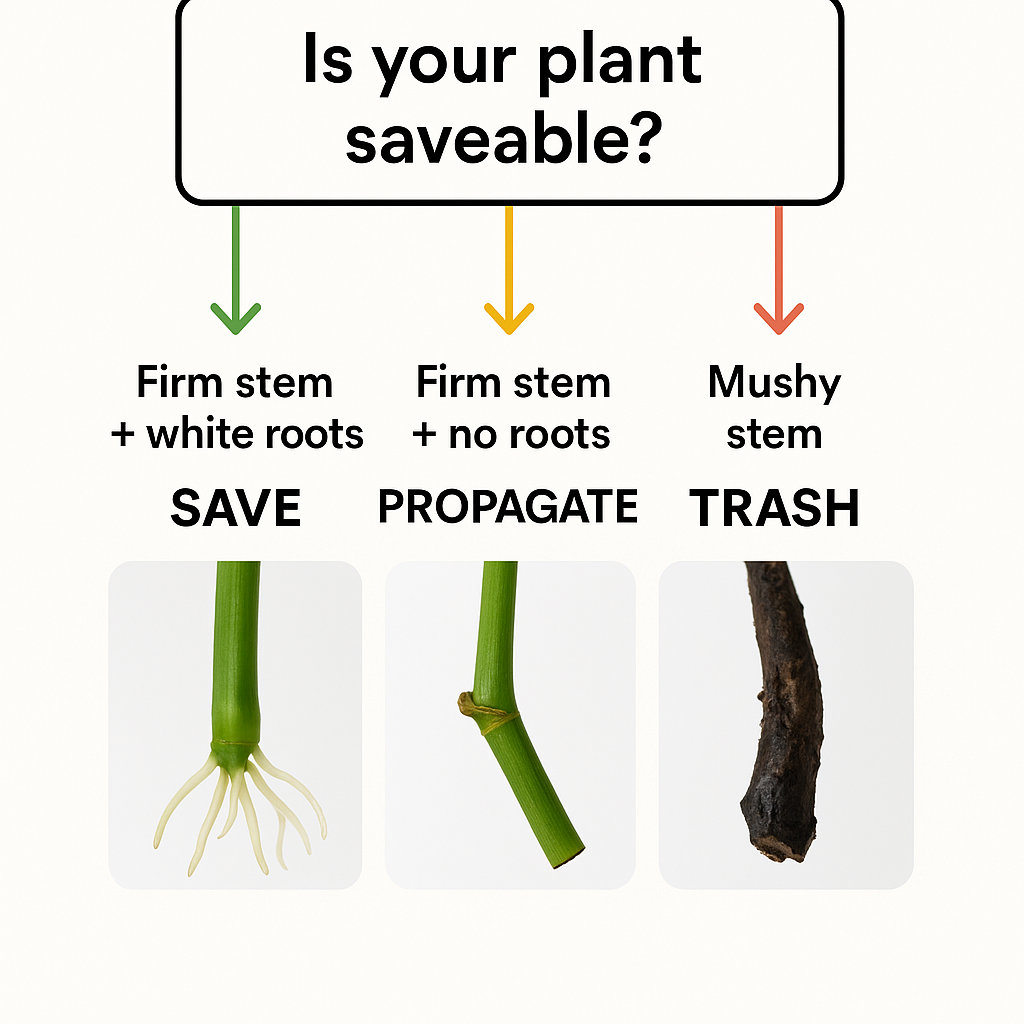
Save vs Propagate vs Trash: The Decision Tree
This is the moment of truth. Be honest with yourself here — wishful thinking prolongs the suffering.
Can you save it?
- Firm stem + white/firm roots = yes, save it. Follow the 48-hour protocol above.
- Firm stem + some roots gone (root rot trimmed) = save it, but monitor closely. Reduced root system means slower recovery.
Should you propagate instead?
- Firm stem + roots completely gone (rotted away) = propagate. The plant can't recover without roots, but a firm stem with nodes can still generate new roots.
- How to propagate a dying plant: cut a stem section with at least one node (the bumpy ridge where leaves or aerial roots attach), remove lower leaves, and place in water or moist perlite. Change the water every few days. New roots should appear within 2–3 weeks. Pot once roots are 2–3 inches long.
Is it time to trash it?
- Stem is mushy or hollow when squeezed = trash it. This isn't salvageable. The vascular system that moves water and nutrients is destroyed.
- It happens. Plants die. It doesn't make you a bad plant parent. It makes you human. Compost the soil, clean the pot with bleach solution, and move on.
Your Emergency Plant Kit: What to Have Ready
The best plant emergency is the one you prevent. Having the right supplies on hand before disaster strikes means you can act in minutes instead of hours.
The non-negotiables:
- Moisture meter — takes the guesswork out of soil moisture. Stick it in near the root zone and know immediately whether overwatering or underwatering is your problem. Essential for prevention and during active rescue.
- 3% hydrogen peroxide — the emergency room first aid for root rot. Kills anaerobic bacteria, oxygenates the root zone. Also works for fungus gnats in soil.
- Clean, sharp micro-tip snips — a dirty cut invites infection. Always trim rotted roots and prune dead leaves with clean, sharp tools.
- Fresh chunky potting mix — the right soil is drainage insurance. Standard peat-based mix holds too much moisture for emergency situations.
- Perlite — add to any potting mix to improve drainage and aeration. Essential for plants recovering from overwatering.
- Rooting hormone powder — for propagation salvage. If you need to propagate from a dying plant, rooting hormone increases the odds of successful root generation.

Prevention: Don't End Up Here Again
Once your plant is recovered, don't just go back to autopilot watering. Here's what actually prevents repeat emergencies:
- Water only when the soil is dry — not on a schedule, not when it looks sad. Stick your finger in the soil. Use a moisture meter.
- Make sure every pot has drainage holes — this is non-negotiable. No exceptions.
- Use chunky, fast-draining soil — standard peat mix holds too much water. Add perlite to improve drainage.
- Quarantine new plants for 2 weeks — this is how you catch pest infestations before they spread to your whole collection.
For a full prevention framework, see our watering guide. For ongoing care routines that prevent emergencies, check the houseplant starter kit.
Our Favorite Emergency Plant Kit Products
We use these products ourselves:
The Right Soil Mix Matters — See Our Emergency Favorites →
Want more triage resources? The Plant ER symptom checker has full diagnosis guides for specific problems. For root rot specifically, see the root rot treatment guide. And if you want to learn propagation as a salvage skill, the propagation guide covers everything you need.